
We get piles and piles of catalogs throughout the year. It can be fun to flip through them and dream. On occasion, we even order something. This always ensures that we get another onslaught of catalogs. So what do you do after you're done dreaming and are left with a stack of outdated catalogs?
When I was young, a really lovely couple taught me a fun way to create something useful from old catalogs and magazines. Someday, I will tell you more about them. Today, I'm just going to show you how to make these origami containers. Grab an old catalog or magazine and follow along!
When I was young, a really lovely couple taught me a fun way to create something useful from old catalogs and magazines. Someday, I will tell you more about them. Today, I'm just going to show you how to make these origami containers. Grab an old catalog or magazine and follow along!
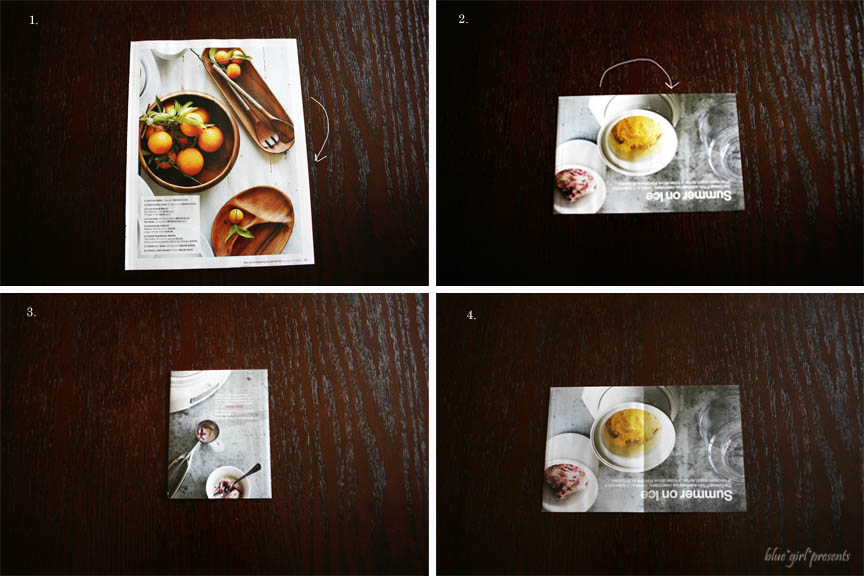
1. Take a single page, and fold it in half horizontally.
2. Now make another fold vertically. This one will just be a crease.
3. Are you craving ice cream right about now? I sure am...
4. Open up the previous fold.
2. Now make another fold vertically. This one will just be a crease.
3. Are you craving ice cream right about now? I sure am...
4. Open up the previous fold.
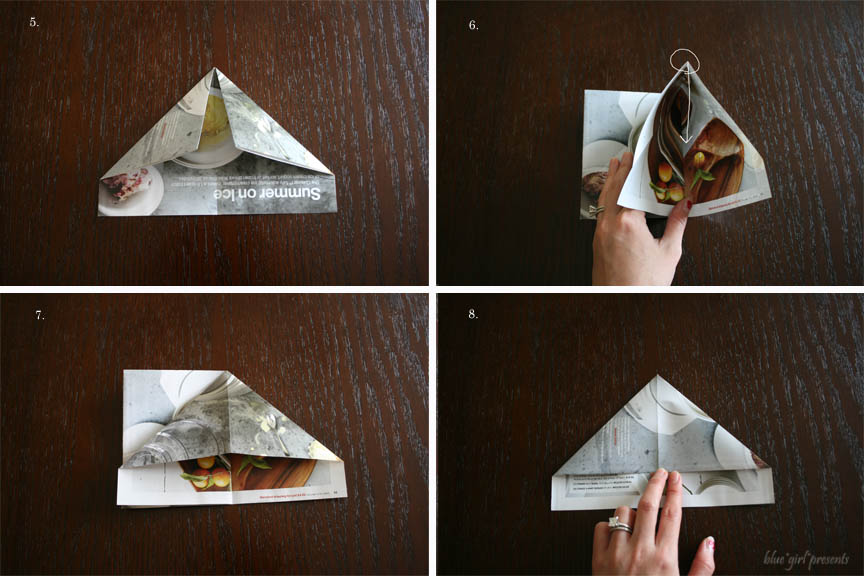
5. Pretend you're making a paper airplane. But just fold and unfold.
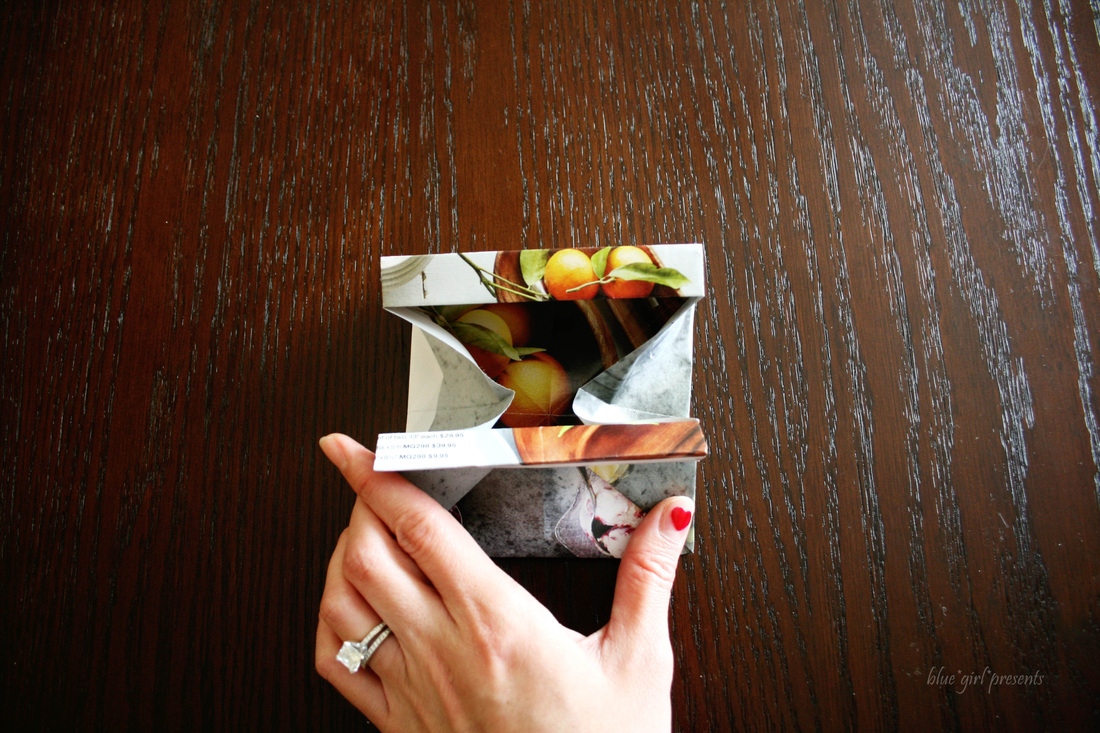
6. Lift one side of the paper. Open it up, then bring the top corner down to meet the crease. (It's really best to follow the photos, because these directions don't make much sense otherwise. :) )
7. It should look like this.
8. Do the same on the other side.
6. Lift one side of the paper. Open it up, then bring the top corner down to meet the crease. (It's really best to follow the photos, because these directions don't make much sense otherwise. :) )
7. It should look like this.
8. Do the same on the other side.
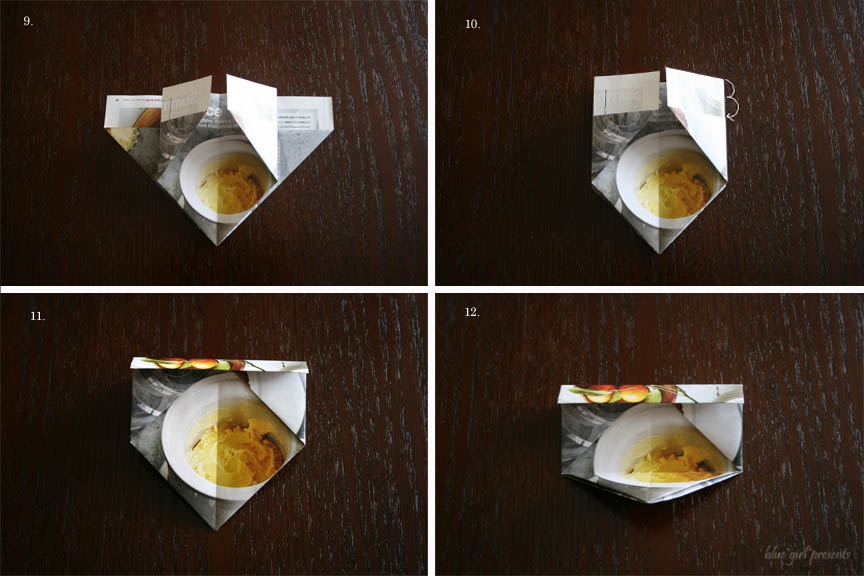
9. Take the wings, and fold them towards the middle. Do this on all sides.
10. Take the top piece and fold it in half, and then make another fold to create the handles on each side.
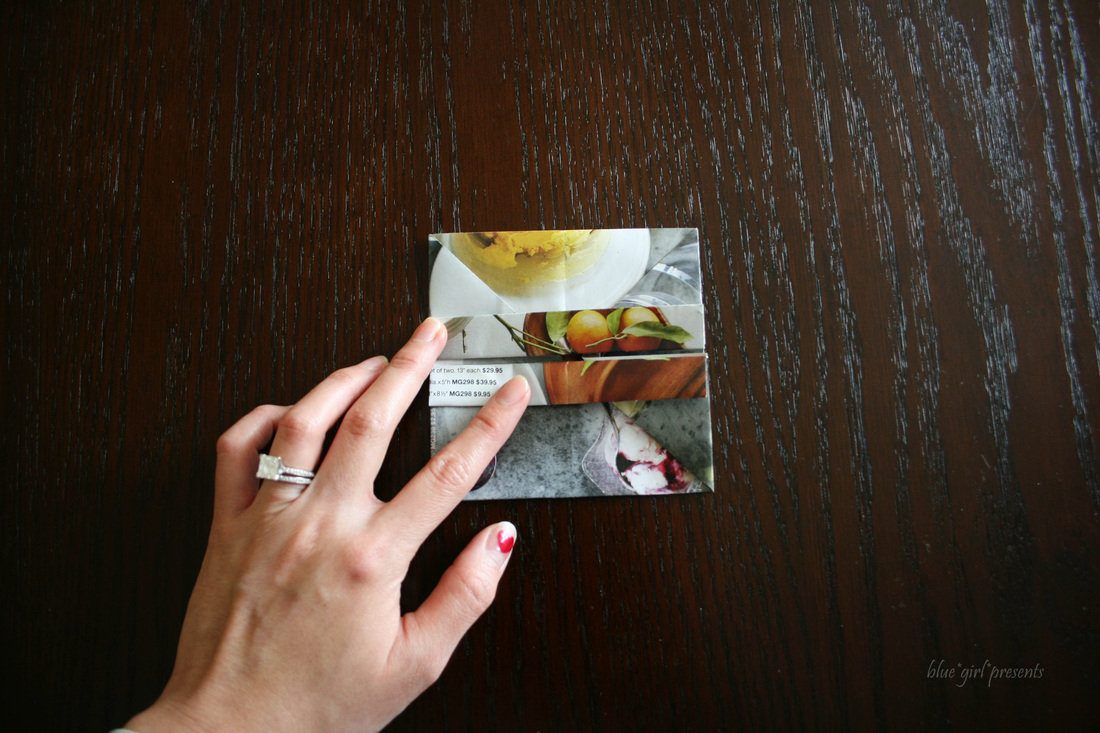
11 - 12. Take the bottom point and bring it up to create a crease. Now you can open up your creation from the top and...
10. Take the top piece and fold it in half, and then make another fold to create the handles on each side.
11 - 12. Take the bottom point and bring it up to create a crease. Now you can open up your creation from the top and...
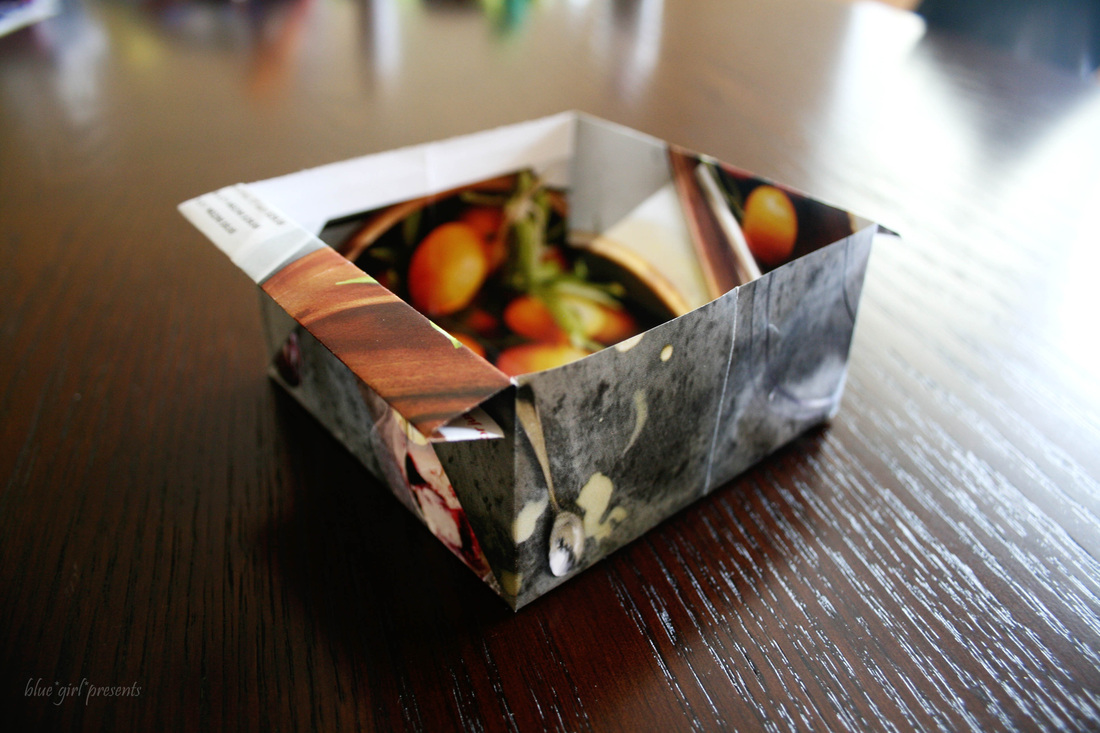
Ta-da!!!!! You have a lovely origami container.
Here's another trick.
Here's another trick.
You can gently push in the sides of the container to collapse it.
Then you fold it in half with the handles facing out...
Then you fold it in half with the handles facing out...

Now you can store a whole bunch of containers inside one open container.
I keep a bunch of these containers in my crafting space.
I keep a bunch of these containers in my crafting space.
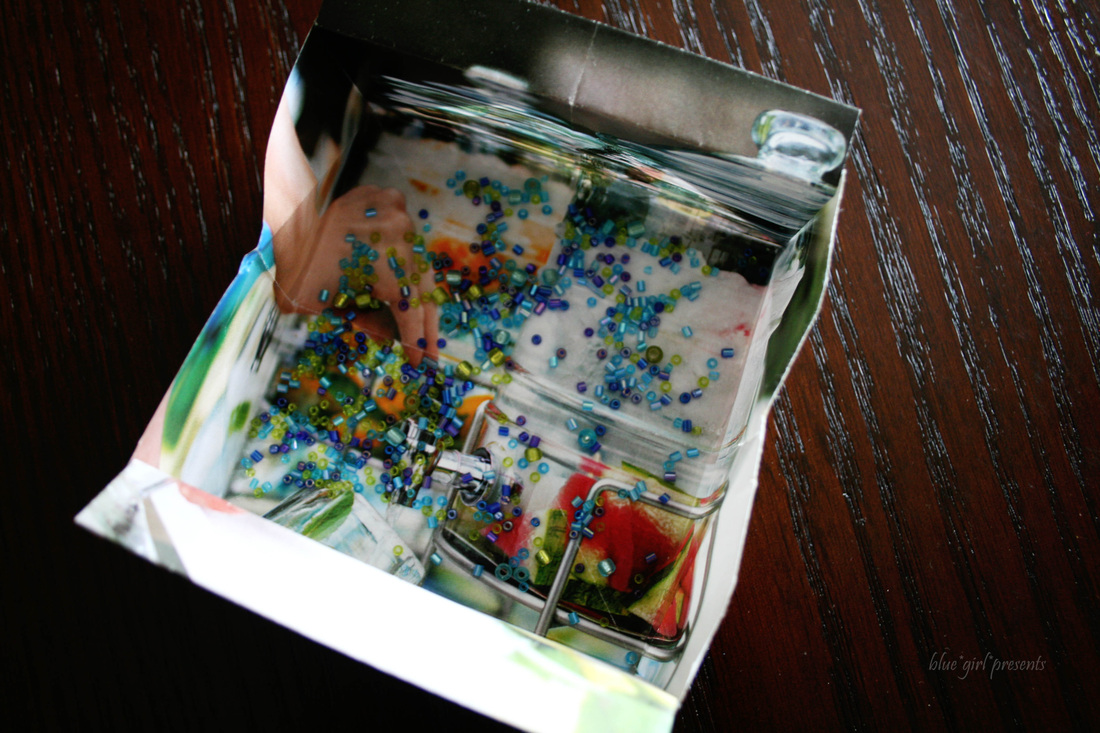
Sometimes I use one to hold beads for a current project.
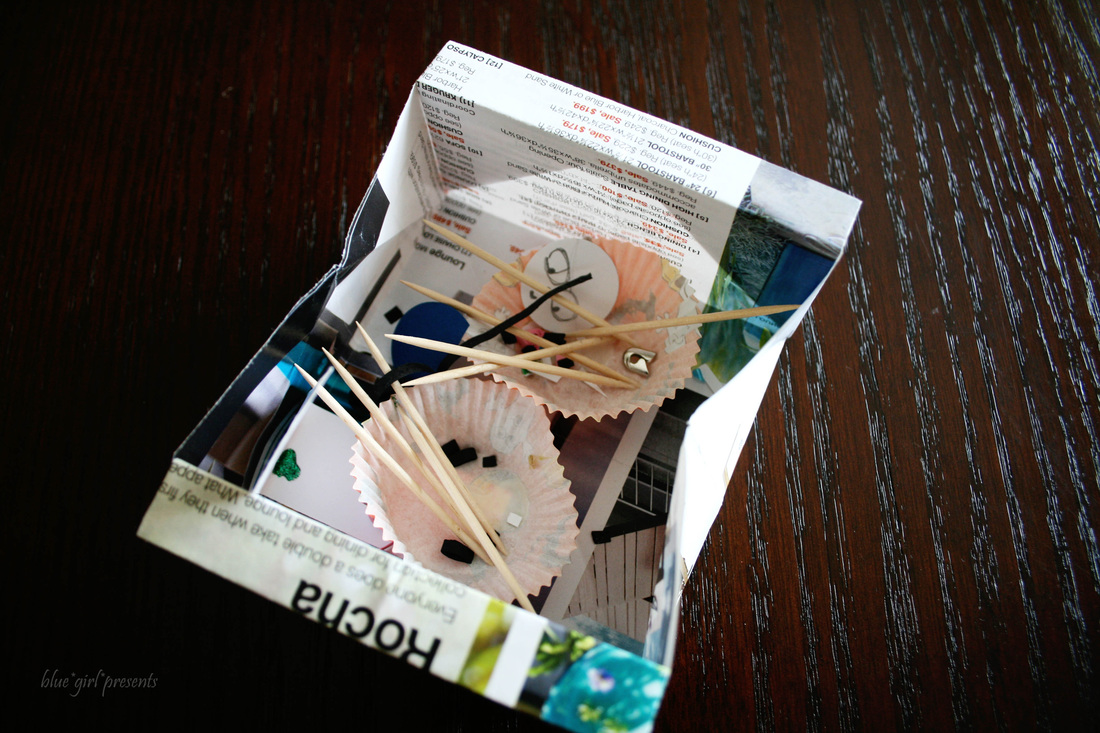
A lot of times, I use them to hold little bits of trash that accumulate while I'm crafting. It's easier to have a little receptacle right at my fingertips than a bigger one on the floor. Afterwards, I can dump the whole thing.
These little containers are great at mealtimes as well. Place one at each seat to contain fish bones, chicken bones, egg shells, or any other non-edible parts of a tasty meal. After your meal, you can just toss them.
Have fun, and let me know if you come up with more uses for these origami containers!


 RSS Feed